For the moment, visibility for LiveForms’s Zapier integration is set to Invite-Only.
To get the invitation link go to the Settings page of LiveForms in your WordPress admin panel.
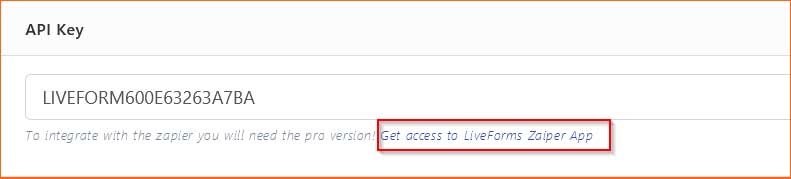
Then click on Get access to LiveForms Zapier App.
It’ll lead you to this page if you are logged into Zapier. If not you need to login first.

Click on Accept Invite & Build a Zap button on this page.
You should now have access to the LiveForms’s Zapier integration to create a Zap in the next steps.
Create Your Zap in Zapier
To continue, you’ll need to log into your Zapier account. If you don’t have an account then you can sign up and create an account for free.
Now that you’re logged in creating a Zap is now few steps away. To do that click on the button on the top-left corner of your Zapier dashboard.
The button looks like this

or this

Then you’ll be redirected to the setup page for your new Zap.
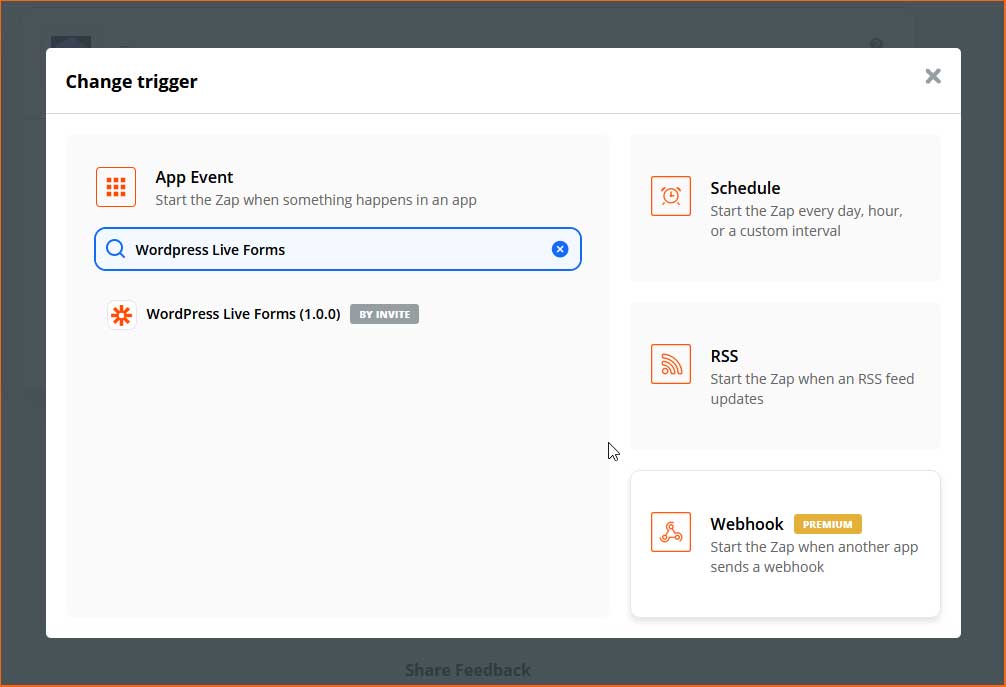
In this step, you’ll need to select WordPress Live Forms as your trigger app. Within the Choose App Event search box, type WordPress Live Forms to find the app faster. Then click WordPress Live Forms from the search results.
After that, you’ll be prompted to select a Trigger Event currently there’s only one event to select. Select New Form Entry from the dropdown options. What it’ll do is trigger this Zap when your selected form has a new submission.
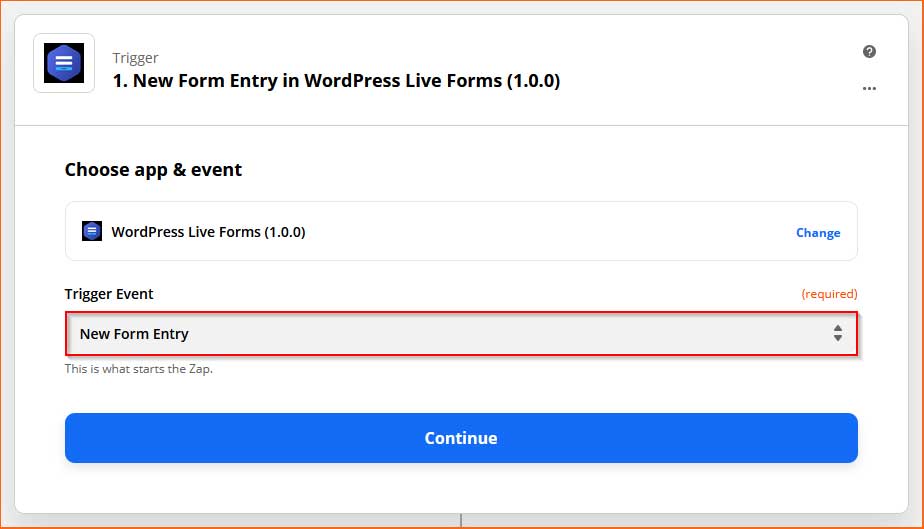
Then click the Continue button to proceed to the next step. Which will lead you to a page like this
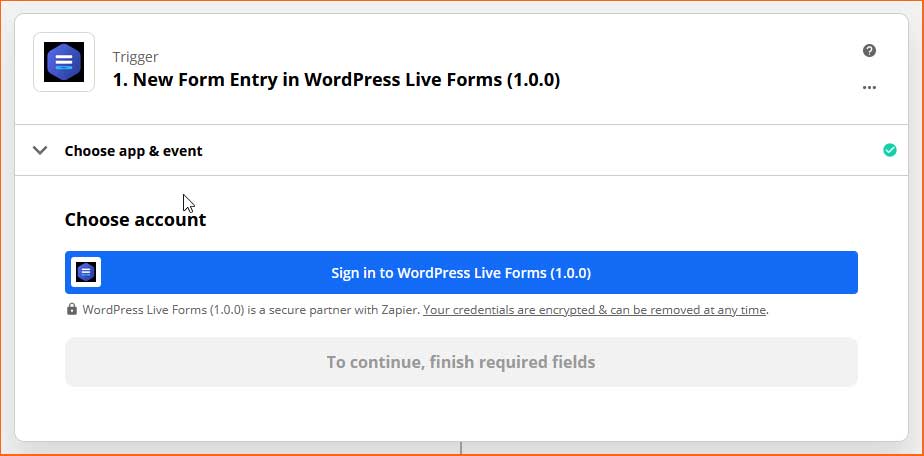
Now, click on that big blue Sign in to WordPress Live Forms button.
This action will open a new browser window with a form for you to fill up to finish the connection between Zapier and your Live Forms plugin.
Fill up the API key assigned to your copy of the Live Forms plugin and the base URL of your website.
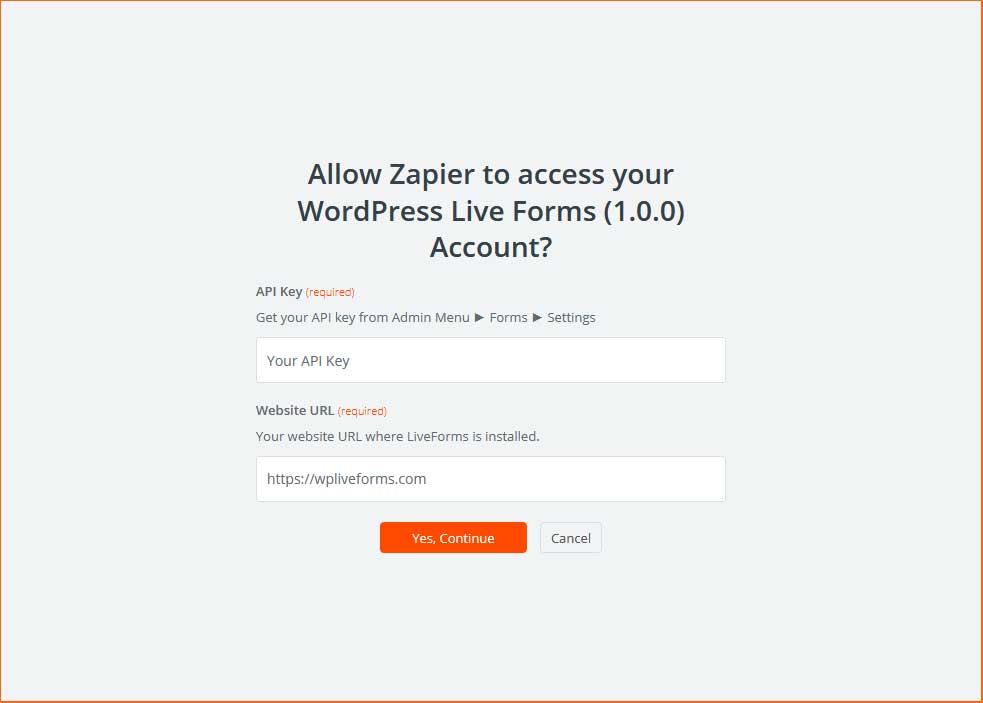
You’ll find the API key at the bottom of the Admin Menu ► Forms ► Settings page.
Click the Yes, Continue button.
This will finalize the connection. Then you will be prompted to select the account that should be used for the Zap you’re creating.
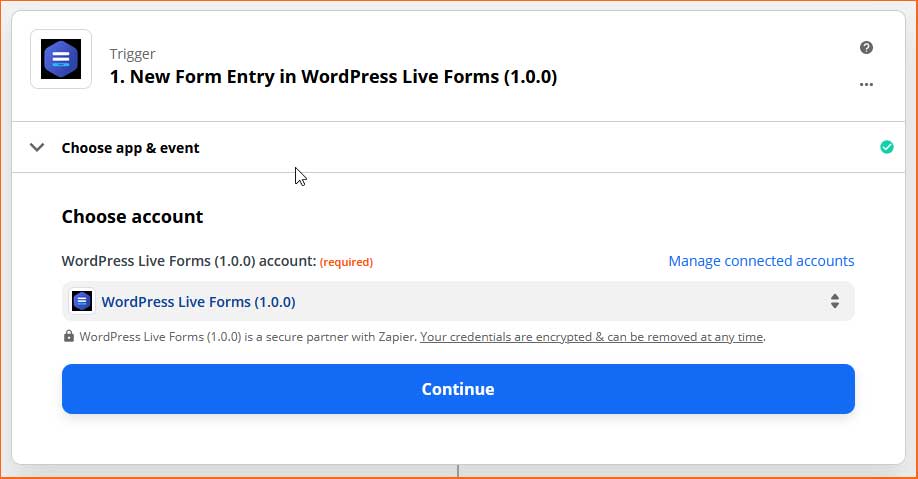
Select the account then click Continue.
Zapier will then bring you to the Find Data step, which will give you a chance to pull in sample entries to test your connection. We recommend doing this by selecting the Test & Continue button before continuing. This will enable you to feel confident that the integration is fully connected.
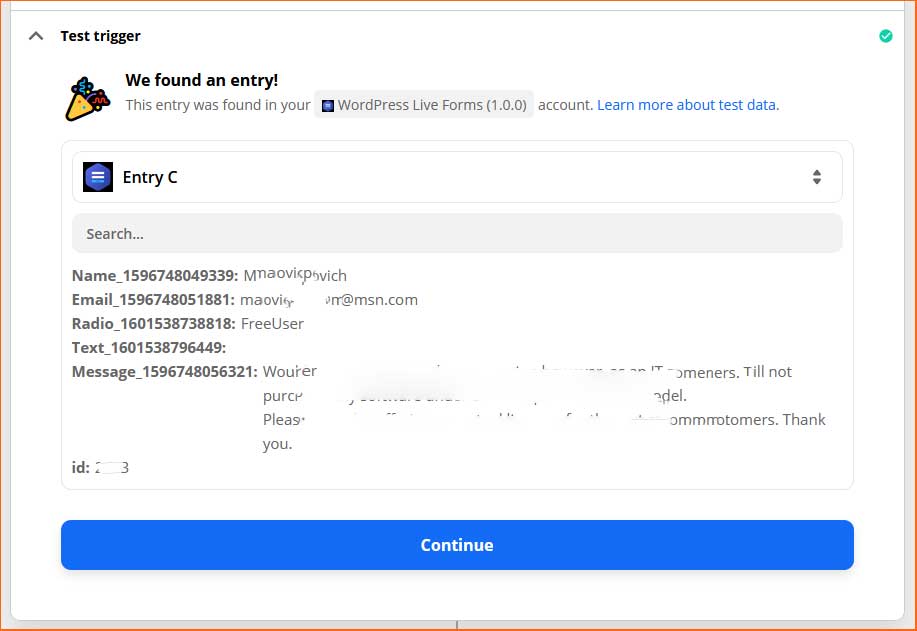
If you’ve selected the Test and Continue button, Zapier will automatically take you to the next step if things are working properly.
If everything works out as expected, after checking your sample entries Zapier will ask you to choose App Event. In this step, you’ll have to define what to do with the new form data that is sent to this Zap.
Zapier has 3,000+ apps and services available, and you can find more about the integrations they offer on Zapier’s site.
Each of these apps has its own actions to respond to other app triggers. Choose your options accordingly.
Then click on Get access to LiveForms Zapier App.
It’ll lead you to this page if you are logged into Zapier. If not you need to login first.
Click on Accept Invite & Build a Zap button on this page.
Create Your Zap in Zapier
To continue, you’ll need to log into your Zapier account. If you don’t have an account then you can sign up and create an account for free.
Now that you’re logged in creating a Zap is now few steps away. To do that click on the button on the top-left corner of your Zapier dashboard.
The button looks like this
or this
Then you’ll be redirected to the setup page for your new Zap.
In this step, you’ll need to select WordPress Live Forms as your trigger app. Within the Choose App Event search box, type WordPress Live Forms to find the app faster. Then click WordPress Live Forms from the search results.
After that, you’ll be prompted to select a Trigger Event currently there’s only one event to select. Select New Form Entry from the dropdown options. What it’ll do is trigger this Zap when your selected form has a new submission.
Then click the Continue button to proceed to the next step. Which will lead you to a page like this
Now, click on that big blue Sign in to WordPress Live Forms button.

This action will open a new browser window with a form for you to fill up to finish the connection between Zapier and your Live Forms plugin.
Fill up the API key assigned to your copy of the Live Forms plugin and the base URL of your website.
You’ll find the API key at the bottom of the Admin Menu ► Forms ► Settings page.
Click the Yes, Continue button.
This will finalize the connection. Then you will be prompted to select the account that should be used for the Zap you’re creating.
Select the account then click Continue.
Zapier will then bring you to the Find Data step, which will give you a chance to pull in sample entries to test your connection. We recommend doing this by selecting the Test & Continue button before continuing. This will enable you to feel confident that the integration is fully connected.
If you’ve selected the Test and Continue button, Zapier will automatically take you to the next step if things are working properly.
If everything works out as expected, after checking your sample entries Zapier will ask you to choose App Event. In this step, you’ll have to define what to do with the new form data that is sent to this Zap.
Zapier has 3,000+ apps and services available, and you can find more about the integrations they offer on Zapier’s site.
Each of these apps has its own actions to respond to other app triggers. Choose your options accordingly.
Live Forms