Creating a new form from the dashboard:
In shorts:
- If you have already installed LiveForms in your WordPress Dashboard, then go to Forms >> Add New.
- Check the templates, any of them may the form you are looking for. Or click on “Start From Ground”.
- Add Form name and description, click on “Create Form”. Now, drag and drop the fields you need.
- Lastly, click on “Save Form” from the top right side, you have now created a new form with LiveForms!
Details:
In the dashboard, once you installed the LiveForms plugin you can see the new menu “Forms” there, it has also many sub-menus. Click on the “Add New” submenu, here you see many ready to use form templates. If you are looking for Contact Form, Login Form, Donation Form, Support Form and Job Application Form, you can choose them from the templates. But if you want to create a new form click on “Start from Ground”.
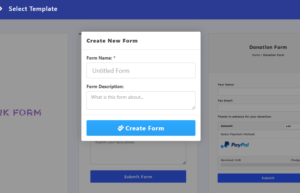
After clicking on the “Start from Ground”, a popup will appear. Where you need to add form name and form description. First of all, give a nice title of the form. This should be meaningful so that you can recognize it later. Similarly, in the description write the purpose of this form and then click on “Create Form”.
As a result, you can see a new page appears where you will find all the modules of the forms. This page is a WordPress post creation page with extra form fields module and settings included. You will find all the details below.
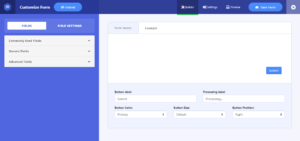
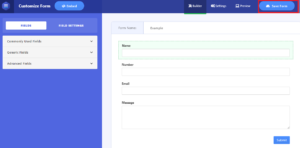
Now from the form field toolbox consists of Commonly Used Fields, Generic Field and Advanced Fields that allow you to select which field types you would like to add to your form. To add a form field to your form simply drag and drop any field from the left side field component list to the Form fields on the right side.

At this point, you may edit individual form fields setting by clicking on the settings icon. You will see the field editor interface on the left side and you can fine-tune the available field options there. To reorder fields on your form, drag and drop them to arrange them in the desired order. To duplicate the field click on the Copy symbolic button and to delete the field click on the Red Cross button.
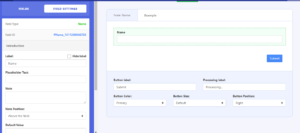
You can set a new label for the field name, add a placeholder text, make a note, set up new conditional logic and make the field required from here. You can select where the note will appear, above the field or below the field. Moreover, there are options to add Default Value and Custom CSS Class.
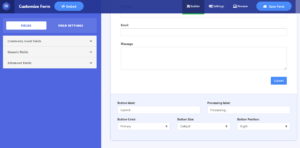
Also, you will get options for customizing the form submission button according to your form type. You can change the Button label, Processing label, Button color, Button size and Button position.
After putting all necessary field(s) and logic in the form just click on the “Save Form” button.
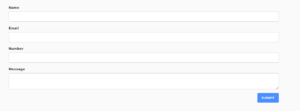
Your form is being saved now. Click on the “Preview” button from the top after saving it so that you can view the form.
Creating a new form from the dashboard:
In shorts:
Details:
In the dashboard, once you installed the LiveForms plugin you can see the new menu “Forms” there, it has also many sub-menus. Click on the “Add New” submenu, here you see many ready to use form templates. If you are looking for Contact Form, Login Form, Donation Form, Support Form and Job Application Form, you can choose them from the templates. But if you want to create a new form click on “Start from Ground”.
After clicking on the “Start from Ground”, a popup will appear. Where you need to add form name and form description. First of all, give a nice title of the form. This should be meaningful so that you can recognize it later. Similarly, in the description write the purpose of this form and then click on “Create Form”.
As a result, you can see a new page appears where you will find all the modules of the forms. This page is a WordPress post creation page with extra form fields module and settings included. You will find all the details below.
Now from the form field toolbox consists of Commonly Used Fields, Generic Field and Advanced Fields that allow you to select which field types you would like to add to your form. To add a form field to your form simply drag and drop any field from the left side field component list to the Form fields on the right side.
At this point, you may edit individual form fields setting by clicking on the settings icon. You will see the field editor interface on the left side and you can fine-tune the available field options there. To reorder fields on your form, drag and drop them to arrange them in the desired order. To duplicate the field click on the Copy symbolic button and to delete the field click on the Red Cross button.
You can set a new label for the field name, add a placeholder text, make a note, set up new conditional logic and make the field required from here. You can select where the note will appear, above the field or below the field. Moreover, there are options to add Default Value and Custom CSS Class.
Also, you will get options for customizing the form submission button according to your form type. You can change the Button label, Processing label, Button color, Button size and Button position.
After putting all necessary field(s) and logic in the form just click on the “Save Form” button.
Your form is being saved now. Click on the “Preview” button from the top after saving it so that you can view the form.
Sidratul Sohrat
I am Sidratul Sohrat, a dedicated content writer with a fervent passion for creating engaging and informative content related to technology, business, and marketing.